Introduction
Painting 1/72 scale figures is an art form that requires patience, precision, and attention to detail. At this small scale, even the slightest brushstroke can make a huge difference, transforming a simple figure into a lifelike representation. Whether you're a seasoned modeler or just starting out, mastering this scale takes practice, but with the right techniques, you can achieve truly stunning results.
In this article, we’ll explore essential tips and techniques that will help you bring your 1/72 scale figures to life, focusing on painting, detailing, and creating a sense of realism that will make your miniatures stand out.
1. Understanding the 1/72 Scale
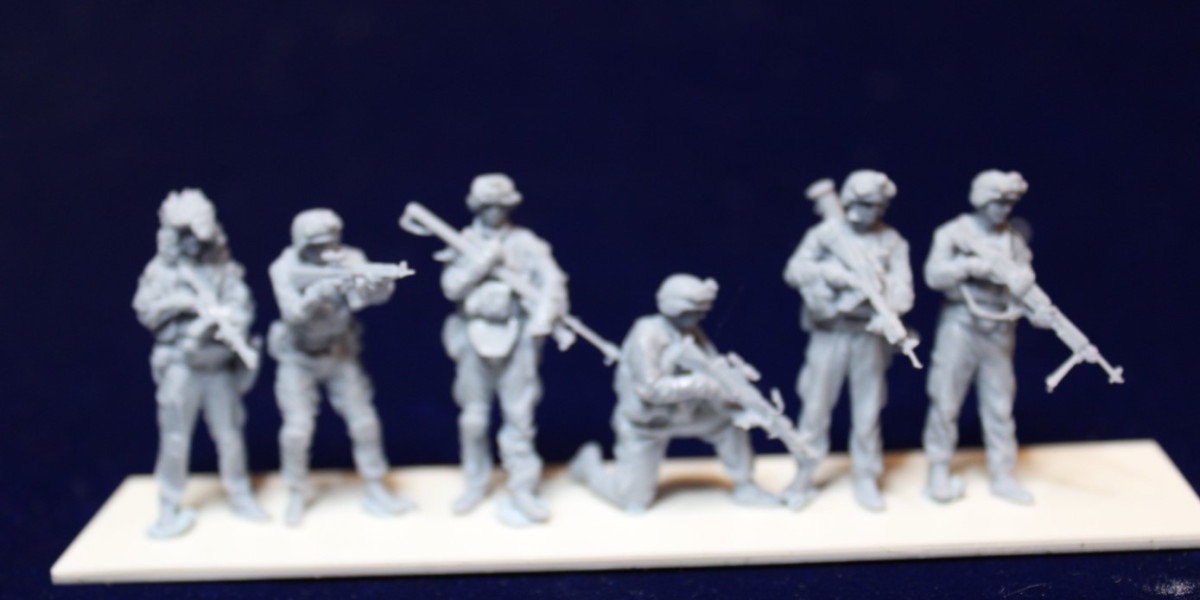
The 1/72 figures scale is a popular choice for modelers, especially in military dioramas, because it offers a balance between detail and manageability. At this scale, one inch on the figure equals six feet in real life, making these miniatures small enough to build large armies or complex scenes without requiring too much space. However, the challenge lies in capturing realistic detail on such small figures.
2. Preparing Your Figures for Painting
Proper preparation is the foundation of a great paint job. Without it, even the best painting techniques can fall short.
2.1 Cleaning the Figures
Before painting, wash your figures in warm, soapy water to remove any mold release agents that may prevent paint from adhering properly. Allow them to dry completely before proceeding.
2.2 Removing Flash and Mold Lines
Use a sharp hobby knife or fine sanding stick to carefully remove any excess plastic, flash, or mold lines. These imperfections can be distracting and reduce the overall realism of your miniature.
2.3 Priming for Success
Priming creates a surface that helps paint adhere and prevents chipping. Choose your primer color based on the final color scheme of your figure. A black primer is great for dark uniforms and shading, while a white or gray primer is ideal for brighter color schemes.
3. Choosing the Right Paints
Paint selection is crucial for achieving the desired finish on your 1/72 scale figures. Acrylic paints are the go-to choice for many modelers due to their ease of use and quick drying time.
3.1 Acrylic vs. Enamel
Acrylic Paints: Water-based, fast-drying, and easy to clean up, they are ideal for beginners and pros alike. They offer a wide range of vibrant colors and are less toxic than enamel paints.
Enamel Paints: Oil-based and slow-drying, they provide a harder finish but require solvents for cleanup. Enamels are often used for detailed work, such as metallic finishes.
3.2 Thinning Your Paints
Always thin your paints slightly before applying them to your figures. This prevents thick, uneven layers and helps maintain the intricate details of your miniatures. You can thin acrylics with water or a specialized medium.
4. Essential Tools for Miniature Painting
Equipping yourself with the right tools can make a huge difference in the quality of your work. Here are some must-have tools for painting 1/72 figures:
4.1 Fine-Tipped Brushes
Invest in high-quality brushes with fine tips, such as size 00 or 000, for detail work. The smaller the figure, the more control you need over the brush strokes.
4.2 Wet Palette
A wet palette helps keep your paint moist for longer, giving you more time to blend colors and apply thin layers. This is especially helpful when working on detailed miniatures.
4.3 Magnifying Glass or Optivisor
Due to the small scale of 1/72 figures, a magnifying tool can be invaluable for painting fine details like eyes, facial features, and insignia on uniforms.
5. Mastering Basic Painting Techniques
These core painting techniques will help you achieve a professional finish on your 1/72 figures.
5.1 Base Coating
Start by applying a thin base coat of paint that covers the entire figure. This provides a foundation for the rest of your colors. Choose a color that matches the largest area of the figure, such as the uniform or skin.
5.2 Dry Brushing
Dry brushing is a technique used to highlight raised areas on your figures. Load a brush with paint, then remove most of it on a paper towel. Gently brush over the figure, leaving paint on the raised surfaces like folds in clothing or weapon edges. This technique adds depth and texture.
5.3 Washes
Washes are diluted paint mixtures that flow into the crevices of your figure, creating shadows and emphasizing details. Use a darker shade of your base color or a black wash to add definition to areas like folds in fabric, facial lines, and recessed parts of equipment.
6. Creating Realistic Skin Tones and Faces
Painting skin and facial features on 1/72 figures can be challenging, but with practice, you can achieve impressive results.
6.1 Skin Tones
Start with a base color that matches the figure’s skin tone. Once dry, apply a wash to create shadows in the recesses of the face and exposed skin areas. Highlight raised areas, like the nose and cheekbones, with a lighter shade of the base color to add depth.
6.2 Eyes
Painting eyes at this scale can be tricky, but you don’t need to paint detailed pupils. A small dot of dark paint in the eye socket will give the illusion of eyes without overwhelming the figure’s tiny face.
7. Painting Uniforms and Camouflage
Uniforms are one of the most important elements of military miniatures, and painting them accurately can bring a sense of realism to your figures.
7.1 Historical Accuracy
If you're painting military figures, research the uniforms worn by soldiers during the time period you're modeling. Accurate colors, insignia, and equipment placement are key to creating believable miniatures.
7.2 Camouflage Patterns
For soldiers wearing camouflage, apply the base color of the uniform first. Then, using a fine brush, paint small, irregular patches of secondary colors to replicate the camouflage pattern. Keep the pattern consistent across the figure to maintain realism.
8. Adding Detail to Weapons and Gear
Weapons and equipment play a significant role in the overall look of your 1/72 figures.
8.1 Painting Weapons
Use metallic paints sparingly to add a realistic sheen to guns, swords, and other metallic objects. Apply a black or dark brown wash over the metallic areas to give them a worn, battle-tested appearance.
8.2 Weathering Equipment
To make gear and weapons look worn and used, apply light dry brushing with a lighter color to simulate wear and tear. You can also use washes to simulate dirt, mud, or rust.
9. Highlighting and Shading for Realism
To achieve the most realistic effects, highlighting and shading are crucial.
9.1 Highlighting
Apply a lighter shade of your base color to raised areas of the figure, such as the tops of shoulders, knees, and elbows. This helps to create the illusion of light reflecting off the figure.
9.2 Shading
Shading involves applying a darker color or wash to the recesses of the figure, such as the folds of clothing or the contours of the face. This adds depth and contrast, making the figure appear more three-dimensional.
10. Final Touches and Varnishing
The final touches can make a significant difference in the overall appearance of your figure.
10.1 Sealing Your Work
Once you're happy with your figure, apply a coat of varnish to protect the paint and enhance its longevity. A matte varnish is typically preferred for 1/72 figures, as it reduces shine and gives a more realistic finish.
10.2 Basing
To complete your figure, consider adding a detailed base that complements the environment the figure is meant to be in. Grass tufts, rocks, or even small pieces of rubble can enhance the overall presentation.
Conclusion
Mastering the art of painting 1/72 scale figures takes time, but with practice, the right tools, and attention to detail, you can achieve stunning realism. By following these tips and techniques, you'll bring your miniature soldiers to life, creating dynamic and historically accurate figures that are perfect for display or diorama building. Whether you're just starting or looking to refine your skills, this guide will help you take your painting to the next level.
FAQs
How long does it take to paint a 1/72 scale figure?
Depending on the complexity and level of detail, painting a single 1/72 figure can take anywhere from a couple of hours to several days.What type of brushes are best for painting 1/72 figures?
Fine-tipped brushes, such as size 00 or 000, are ideal for painting small details on 1/72 figures.Can I use regular acrylic paints for 1/72 figures?
Yes, regular acrylic paints are perfect for 1/72 figures, as they dry quickly and are easy to clean up.Do I need to use a magnifying glass for painting 1/72 figures?
While not essential, a magnifying glass or optivisor can help with fine details, especially when painting facial features or insignia.Should I apply a varnish after painting my figures?
Yes, applying a matte or satin varnish will protect your paint job and give your figures a professional, polished finish.
Our Social Pages:
https://plastic-models-store.com/
https://www.facebook.com/plastic.models.store
https://www.instagram.com/plastic_models_store/
https://www.youtube.com/channel/UCKpiM8Q6k2XjOwN9lW0fOrw