Introduction
Building and painting model tanks is a fascinating hobby that combines history, craftsmanship, and artistic expression. Whether you're recreating a World War II-era Sherman or a modern-day Abrams, the process involves precision and creativity to achieve a realistic finish. This step-by-step guide will take you through every stage, from assembly to painting, and finally, adding realistic weathering effects to bring your model to life.
1. Selecting the Right Model Kit
Before starting your project, it’s essential to choose the right model tanks kit for your skill level and interest.
Skill levels: Kits are categorized by complexity, ranging from beginner to advanced. If you're just starting, look for kits labeled "Level 1" or "Beginner," which have fewer parts and easier assembly instructions.
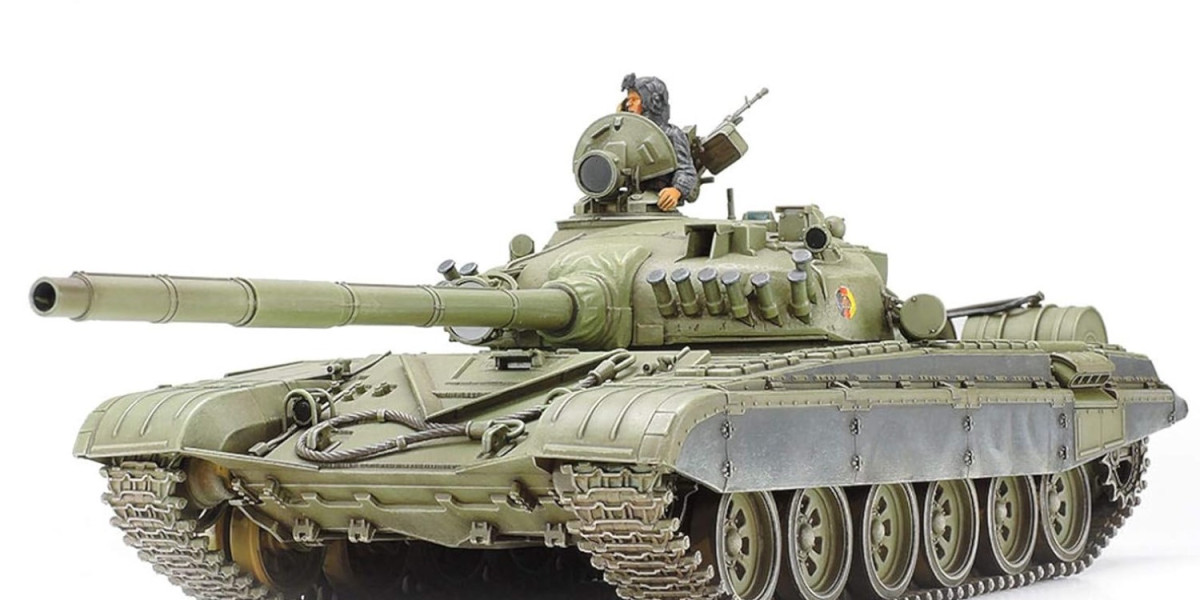
Popular tank models: For historical accuracy, WWII tanks like the German Tiger I or American M4 Sherman are excellent choices. For modern warfare enthusiasts, the M1A2 Abrams or the T-90 Russian Tank are great options.
Scale: Most tank models come in scales like 1/35, 1/48, and 1/72. Larger scales, like 1/16, allow for more detailed builds but are also more challenging. For beginners, 1/35 is a good starting point.
2. Tools and Supplies You’ll Need
Gathering the right tools and supplies is crucial for a smooth build.
Hobby knife: For cutting parts from sprues and trimming excess plastic.
Sprue cutters: To clip pieces off the sprue without damaging them.
Sandpaper or sanding sticks: For smoothing out rough edges or flash.
Plastic cement or model glue: Specifically formulated for bonding plastic parts.
Tweezers: To handle small, delicate parts.
Paints: Acrylic or enamel paints for base color, detailing, and weathering effects.
Paint brushes: Various sizes for detailed work and larger surface coverage.
Airbrush (optional): For smoother, more professional paint finishes.
3. Preparing the Parts
Before assembly, it’s essential to prepare your parts properly for a seamless build.
Cleaning: Wash all parts in warm soapy water to remove any mold release agents used during the manufacturing process. This ensures better glue and paint adhesion.
Examine instructions: Carefully study the instructions and plan your build. Knowing the assembly sequence can prevent mistakes down the line.
Trim and sand: Use your hobby knife or sprue cutters to remove the parts from the sprue. Then, sand any rough edges or mold lines for a clean finish.
4. Assembling the Tank
This is where your model starts to take shape. Follow the manufacturer’s instructions closely, and take your time to ensure precision.
4.1 Dry Fit the Parts
Before applying any glue, always dry fit the parts together to check their alignment.
Why it matters: Dry fitting helps you see how pieces fit and allows you to make any necessary adjustments before gluing.
Adjust if necessary: If the parts don’t align perfectly, use a file or sandpaper to fine-tune them for a better fit.
4.2 Applying the Glue
When gluing parts, precision is key to avoid messy seams.
Use a small amount: Less is more. Apply glue sparingly to avoid excess that can mar the surface.
Capillary action: For small parts or seams, use thin plastic cement that flows into the gaps by capillary action.
Let it dry: Patience is vital—let each section dry thoroughly before moving on to the next step.
5. Priming the Model
Once the tank is assembled, priming is an essential step before painting.
Why prime? Priming provides an even surface for the paint to adhere to and highlights any imperfections that need fixing.
Choosing a primer: Use a primer color that complements your final paint job. Gray, black, or white primers are common choices, depending on your color scheme.
Application: Apply the primer in light, even coats from about 6–12 inches away to avoid pooling or dripping.
6. Painting the Base Color
Now comes the fun part—applying the base color.
6.1 Airbrush vs. Hand Painting
While airbrushing gives a smoother, more even finish, hand-painting can work just as well for beginners.
Airbrushing: If you have an airbrush, apply thin, even coats to achieve a professional-grade finish. It’s ideal for larger models and detailed camouflage patterns.
Hand painting: For those without an airbrush, thin your paint slightly to avoid brush marks. Apply several thin coats rather than one thick coat to achieve an even finish.
6.2 Common Colors for Tanks
World War II tanks: The American M4 Sherman is often painted olive drab, while German tanks like the Tiger I feature Dunkelgelb (dark yellow), with potential camouflage.
Modern tanks: The M1 Abrams is typically painted in desert or forest camouflage, while Soviet-era tanks might be a shade of dark green.
7. Adding Camouflage and Markings
Many tanks, especially those used in combat, feature intricate camouflage patterns and distinctive markings.
Camouflage techniques: Use masking tape, Blu Tack, or stencils to achieve sharp-edged camouflage patterns. For soft-edged patterns, an airbrush works best, but you can also freehand with a fine brush.
Decals and markings: Apply unit insignia, numbers, or national markings using decals. Soak the decal in water for a few seconds, then slide it onto the model’s surface and press it down with a cotton swab.
8. Weathering for Realism
Weathering adds realism to your model by simulating the effects of battle and wear and tear.
8.1 Washes
A wash is a thinned-down paint applied to the recessed areas of the model to highlight panel lines and add depth.
How to apply: Apply a dark wash (like black or brown) over the entire model, focusing on crevices, panel lines, and bolts. Once it’s dried, gently wipe away the excess from the raised areas with a damp cloth or cotton swab.
8.2 Dry Brushing
Dry brushing highlights the raised edges of the model, simulating wear.
Technique: Dip your brush in paint, then remove most of it on a paper towel. Lightly brush it over the edges of the model to highlight corners and worn metal areas.
8.3 Chipping and Rust Effects
Simulate paint chips and rust for added realism.
Chipping: Use a fine brush or a sponge to apply small chips of dark brown or metallic paint to areas where the paint would naturally wear away, like edges or hatches.
Rust: Apply rust-colored weathering powders or thinned-down paint around exhausts, joints, and other metal areas that would corrode over time.
9. Sealing the Model
Once you’re satisfied with the paint job and weathering, it’s time to seal your model.
Matte vs. gloss finishes: For most tanks, a matte finish is ideal, as military vehicles typically have a non-reflective surface. Gloss finishes are good for areas with decals or shiny metal parts.
Apply a top coat: Use a clear acrylic spray to protect your model from dust, scratches, and fingerprints.
10. Adding Final Details
The final step is to add any additional details or accessories.
Crew figures: Some tank kits come with figures. Paint these separately before placing them inside or next to the tank.
Antennae and tools: Add antennas, shovels, or spare tracks to enhance the realism of your model.
Conclusion
Building and painting model tanks is a rewarding process that allows you to create historically accurate replicas or custom designs. With the right tools, techniques, and patience, you can bring your model tank to life, from assembly to detailed weathering effects. Whether you're recreating a tank from WWII or a modern battlefield, this guide will help you achieve a realistic and satisfying result.
FAQs
What scale should I start with as a beginner?
For beginners, 1/35 scale is the most popular and offers a good balance between detail and ease of assembly.
Do I need an airbrush to paint my tank model?
While an airbrush provides smoother results, hand-painting with good brushes and thin paint layers can also achieve excellent results.
How long does it take to build and paint a model tank?
The time varies depending on the complexity of the kit and the level of detail you want to add. On average, it can take anywhere from a few days to a few weeks.
Can I use regular glue to assemble model tanks?
It's best to use plastic model cement or liquid cement specifically designed for scale models, as these create a strong bond between plastic parts.
What is the easiest way to add realistic weathering effects?
Applying washes and dry brushing are beginner-friendly techniques that can quickly add depth and realism to your model.
Our Social Pages:
https://plastic-models-store.com/
https://www.facebook.com/plastic.models.store
https://www.instagram.com/plastic_models_store/
https://www.youtube.com/channel/UCKpiM8Q6k2XjOwN9lW0fOrw